Posts

Asymmetric cryptography using Angular 9 and Asp.net Web Api

Image
Introduction Nothing better than to learn something new during our free time. A new programming language, why not. Thus to make my mind busy as a geek i tried to learn Angular 9 and create a small application nothing fancy at all and called it Asymmetric cryptography. In simple words using Angular 9 to create the client side application and hooked it up with an ASP.NET web api. To conclude i deployed the application on Microsoft azure. How it works Key generation Asymmetric cryptography uses 2 key pairs to encryption  and decryption data. The 2 keys consist of a private key and a public key. To produce a cipher text (encryption), the public key alongside with the plain text will be used. In the same way, in order to produce a plain text (decryption) the cipher text will be used with the private key. The images below illustrate how asymmetric cryptography works: To use the application first select the key length namely: 512 bit 1024 bit 2048 bit 4096 bit

Occupational therapy application for Dr. R.Seedhoo

Image
Introduction During my visit to ENT hospital Mauritius, I met Dr. R.Seedho, a senior occupational therapist. We had several meetings where we discussed the flow of operation, existing problem and why he wants to go forward with creating a custom made application to meet his needs. Based on the fact that Dr. R.Seedho wanted a system that will run only in his machine and must be able to do so with or without an internet connection, thus we decided to create a desktop application. After some prototyping, hours of coding and testing I created the application which Dr. R.Seedho was really pleased with the outcome and even better than he expected. How it works Main menu In order to achieve the best user experience I have decided to keep the main menu and navigation bar as simple as possible with the following menu: Appointment: view today's appointment and search for appointment. New appointment: add new patients with details such as medical records, range of motion, pre

BMI Calculator Android App on Google Play

Image
Introduction My first android application that i published on google play. it is a simple application to calculate an individual body fat. This app was beautifully crafted using material design as font end implementation and the new official language of android which is Kotlin. Google Play You can download the application on Google play using this link:  https://play.google.com/store/apps/details?id=com.kaveersoftware.kaveer.bmicalculator How it works Splash screen The splash screen will load components which will be used in the next activity which is the main activuty where all the process and calculation of BMI will take place Main Activity The main activity is used to prompt user to enter details such as their weight and height either in metric or imperial measurement system The app will perform validation check on the user input data. If all data are valid the application will use the data to perform calculation of BMI. below is a code sni

Face recognition using EmguCV 3.0 and typing pattern recognition

Image
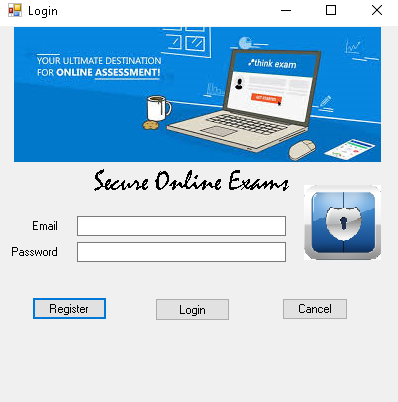
Introduction An MSc project with the title Student Examination System, where the objective is to put the students in an examination condition but instead of having an invigilator in an examination center, the system will cater for the proper ongoing of the exam. the system can be used as an online examination system The system is able to: Recognizing the face shape of a particular student Detect if there is more than one person in the examination room  Analyze the typing pattern of a student and detect if any one person is taking part in the exam voice recognition for the student and detect if there is more than one person speaking in the examination room Setup Download Emgu CV from  http://www.emgu.com/wiki/index.php/Main_Page Download Haarcascade from  https://github.com/opencv/opencv/tree/master/data/haarcascades Create an account at  https://www.keytrac.net/ Face recognition The snippet below illustrates how the Emgu CV is loaded when the application starte

SQL Server tutorial part 6 - Check constraints

Definition Check Constraint is used to limit range that can be placed in a column Check Constraint Column level Check Constraint Table level Please donate and support at https://www.paypal.me/Rajcoomar

SQL Server tutorial part 5 - View

Image
In SQL, a view is a virtual table based on the result-set of an SQL statement. A view contains rows and columns, just like a real table. The fields in a view are fields from one or more real tables in the database. Sample table Sample Data Create View Update View Drop View Please donate and support at https://www.paypal.me/Rajcoomar

SQL Server tutorial part 4 - Index

Image
Indexes are used in SQL server to quickly retrieve the information Type of Indexes In SQL Server indexes are one of the following two types: Clustered Index  Non-Clustered Index.  Clustered Index A clustered index is the index that will arrange the rows physically in the memory in sorted order. An advantage of a clustered index is that searching for a range of values will be fast. Non-clustered Index  A non-clustered index is an index that will not arrange the rows physically in the memory in sorted order.  An advantage of a non-clustered index is searching for the values that are in a range will be fast. You can create a maximum of 999 non-clustered indexes on a table Sample Table Create index Drop index Please donate and support at https://www.paypal.me/Rajcoomar

SQL Server tutorial part 3 - DDL (Data Definition Language) - Alter Table

Image
This SQL Server tutorial explains how to use the ALTER TABLE statement in SQL Server (Transact-SQL) to add a column, modify a column, drop a column, rename a column or rename a table with examples. Sample Table  Alter table add a column Alter table add multiple columns Amend Column Drop Column Please donate and support at https://www.paypal.me/Rajcoomar

SQL Server tutorial part 2 - DDL (Data Definition Language) - Create Table

Image
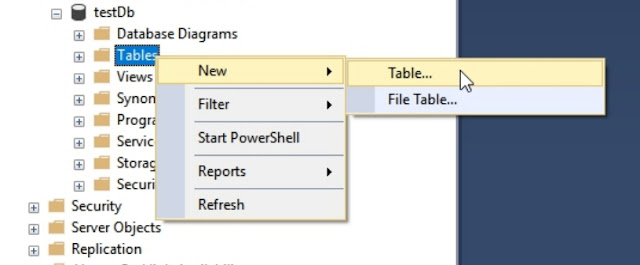
The CREATE TABLE statement is used to create a new table in a database. The following constraint can be applied when creating a table: NOT NULL  - Ensures that a column cannot have a NULL value UNIQUE  - Ensures that all values in a column are different PRIMARY KEY  - A combination of a NOT NULL and UNIQUE. Uniquely identifies each row in a table FOREIGN KEY  - Uniquely identifies a row/record in another table CHECK  - Ensures that all values in a column satisfy a specific condition DEFAULT  - Sets a default value for a column when no value is specified INDEX  - Used to create and retrieve data from the database very quickly Using script Create temporary table Using GUI In SQL server management studio expand the database created and right click on "TABLES" from the context menu select NEW > TABLE Create your table and right click on the column that you want to make it as a primary key constraint and from the context menu select Set Pr